 Good morning peeps, today I’m sharing my 5 Top tips for Memory Keeping layouts with you. I’m pretty new to the scrapbook or memory keeping game formally. I spent loads of time as a child though keeping a journal and every holiday had it’s own book with feathers, railway tickets or stickers in it! I bet a lot of you are the same? Do you stash everything away from a holiday or special day out and then put them into a page or pocket system so you can see them forever? This generation is the most photographed EVER, yet it will be the least recorded for future generations. Why? Because everything is now in digital formats that change and get lost or deleted. Many people delete pictures off their phone to make way for new ones. Those images are lost forever!
5 Top Tips for Memory Keeping Layouts – Number 1
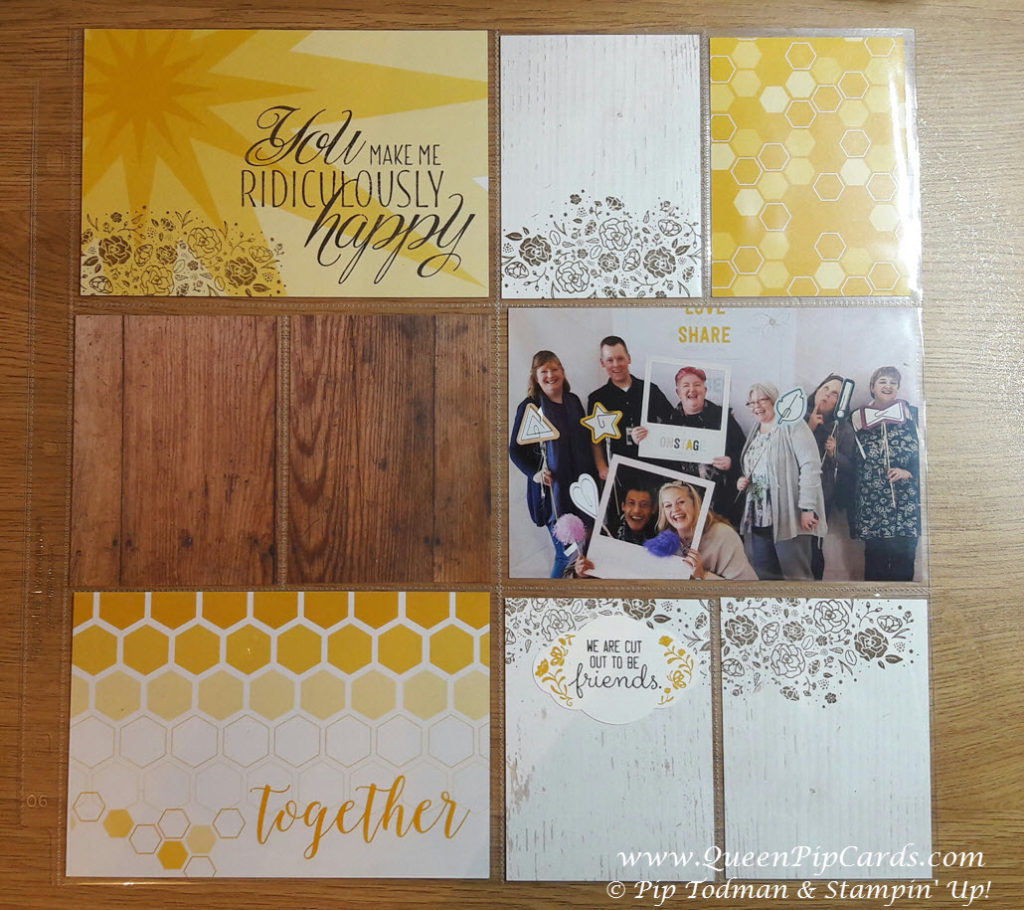
Don’t delete your photos or store them digitally, take the most precious ones and print them out. Get them where you can find them and look back on them easily in an album! These days you shouldn’t feel obliged to do traditional vs pocket page scrapbooking. Mix it up a little, do some full 12 x 12 pages with a single image or images that match, next do a pocket page that coordinates. I was inspired by Caroline van der Straaten of the Netherlands to do a matching pocket page layout to compliment her traditional page. See how well they could look together in a scrapbook album? The colours might need a little tweaking to put side by side, but the layouts would totally follow on the theme of good friends!


5 Top Tips for Memory Keeping Layouts – Number 2
Always create your pages or pocket pages in a double layout view (spread) to start with. Then go back & do your front page. That way your front page leads you into your story, and each double spread and layout will compliment that story. Get a flow going with your photos. You can do it in chronological order or you can choose to just do a page of things that go together for you. For example you could do a page with photos just of all the friends you went on holiday with. Or you can do a specific Day per page or spread.

5 Top Tips for Memory Keeping Layouts – Number 3
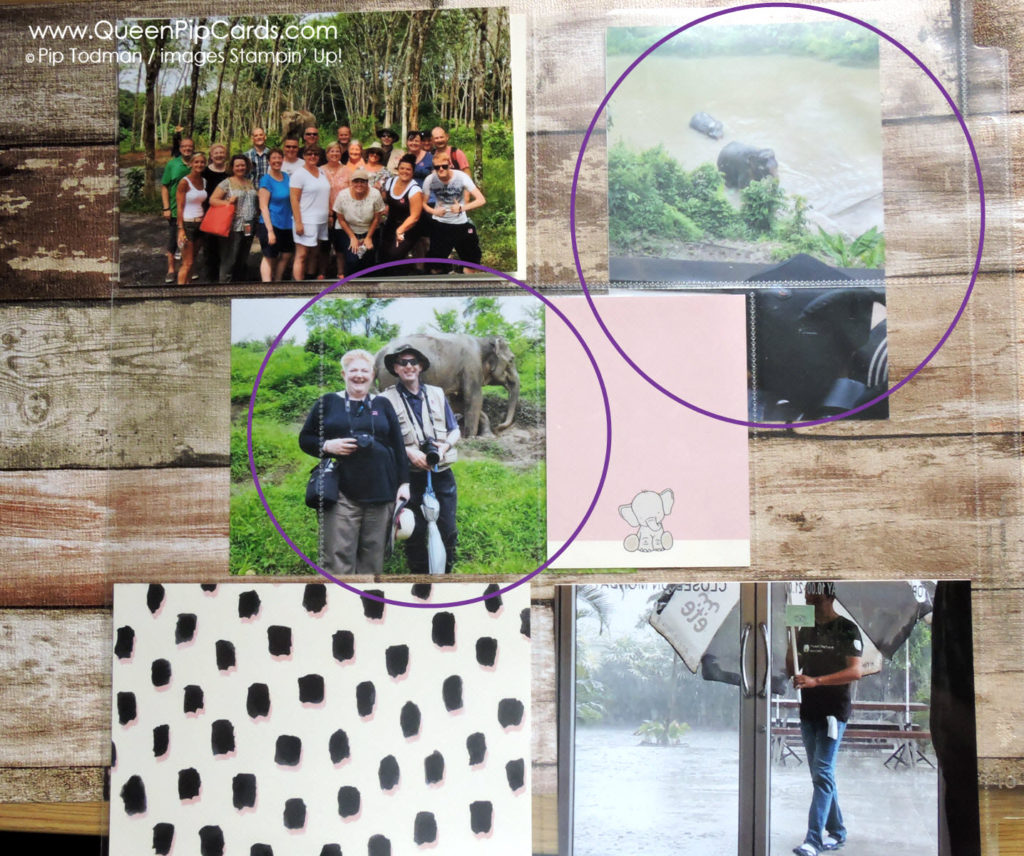
When using the pocket page system from Stampin’ Up! I like to lay my photos on top of the pockets or behind them if I think they need cutting down. Then marry up the card kit cards that will work with those photos. Do everything on top first and that way you will save time and get a feel for the photos you want to cut down before cutting them. This makes it less scary to cut your photos. See the purple circles highlighting where I am positioning the photos.
 For traditional pages, layout all your photos, Card Pack cards and see how they will look before sticking anything down. If you need to secure something, use a dab of our Multipurpose Glue & leave it to dry – when it’s tacky it works as a repositionable glue! So you stick & then remove as needed until you get the layout just right!

5 Top Tips for Memory Keeping Layouts – Number 4
My good friend Julie Kettlewell taught me a great trick. Always embellish the outside of a pocket page, that way if you find a better photo you can swap it out without losing the embellishment or sentiment. Also this means your pockets don’t bulge and make it hard to see the photo inside. This isn’t an issue with the 12 x 12 pages, you can embellish on these, but I wouldn’t recommend going too high! See I glued the heart to the outside of this pocket!

5 Top Tips for Memory Keeping Layouts – Number 5
Make a start! Don’t procrastinate about it – just do it! They are your memories, so what if they’re not perfectly in focus. Who cares if you probably should have got a better photo of Fred. Put in what you have. Enjoy the memory of that day. Start with a 6 x 8 album if a 12 x 12 scares you. I prefer 12 x 12 even though I don’t have much room for them, but mainly JUST START!!

If this has inspired you to do more with your memory keeping that’s great! You can try the different types of traditional or pocket pages using Stampin’ Up! products. I recommend some plain and pocket pages for everyone, you can try both styles and see what you prefer. The items I would recommend to get you started are shown below. You don’t need ALL the card packs, just choose one that suits your photographs!
Crafty hugs, Pip x
#QueenPipCards #StampinUp #papercraft #InspiringYourCreativity
– Use my Monthly Giveaway Code for all orders under £150 in the Host Reward box on your Basket screen online. I will send you a special thank you from me and a share of the rewards next month. Ordering over £150? Keep the rewards for yourself! Click here to read more .


– Click HERE to Join my fabulous team the Royal Stampers today! Just £99 for £130 worth of products! Click here to Join now! or Click here to read about us!
– Click HERE to become a Crafty Corner Member on Facebook!
– Fill in the Subscribe form below to keep up to date with all the news and get exclusive projects from Queen Pip Cards

0 Comments