 Sunday already, our normal blogfest day … no classes this week, but I’ve been busy preparing for next week’s team training and final class of the year, but I’ve also managed to find time to attend a special Demonstrator only event by Stampin’ Up! UK letting us into all the sneak peek information on next year’s Spring / Summer catalogue that launches in January – I KNOW we’re still in my Christmas Countdown and I’m already looking ahead to 2015 – but if I don’t get ready now, then you won’t be able to benefit in January, and I’m soooo all about customer service to all my lovely friends and customers, I’ll just HAVE to look at all the new stuff – again 🙂 Ok, who am I kidding? I LOVE new stuff – however, more on that later – all I’m going to say is – RSVP now for my Launch Event on January 10th – you won’t be disappointed – all the details are here on my Events Calendar.
Anyhoo … back to this year & Christmas, next I wanted to share two amazing card designs I received at Convention this year from two demonstrators – Kim Fee of SimplyFairies at http://kimfeecrafter.blogspot.co.uk/ and Rosalien Zwackhalen from the Netherlands at http://rosalienscreations.blogspot.nl/
Since I didn’t make these cards myself, I have had to de-construct how I think they made them, so hopefully you’ll get the same results!
- Cut Whisper White cardstock to 8 cm x 8 cm
- Cut Soft Sky cardstock to 8.5 cm x 8.5 cm
- Cut Early Espresso cardstock to 10 cm x 20 cm – fold in half
- Stamp a circle (probably using the centre from Daydream Medallion stampset) in soft sky onto the Whisper White
- Stamp the branches from the Ornamental Pine stampset in Pear Pizzazz over the Soft Sky circle
- Stamp the pine cones from the Ornamental Pine stampset in Early Espresso on top of the branches
- Add Dazzling Details to the branches and cones to give sparkle
- Layer all together and then stamp the sentiment on a piece of Whisper White cardstock in Early Espresso and adhere with Dimensionals to give lift.
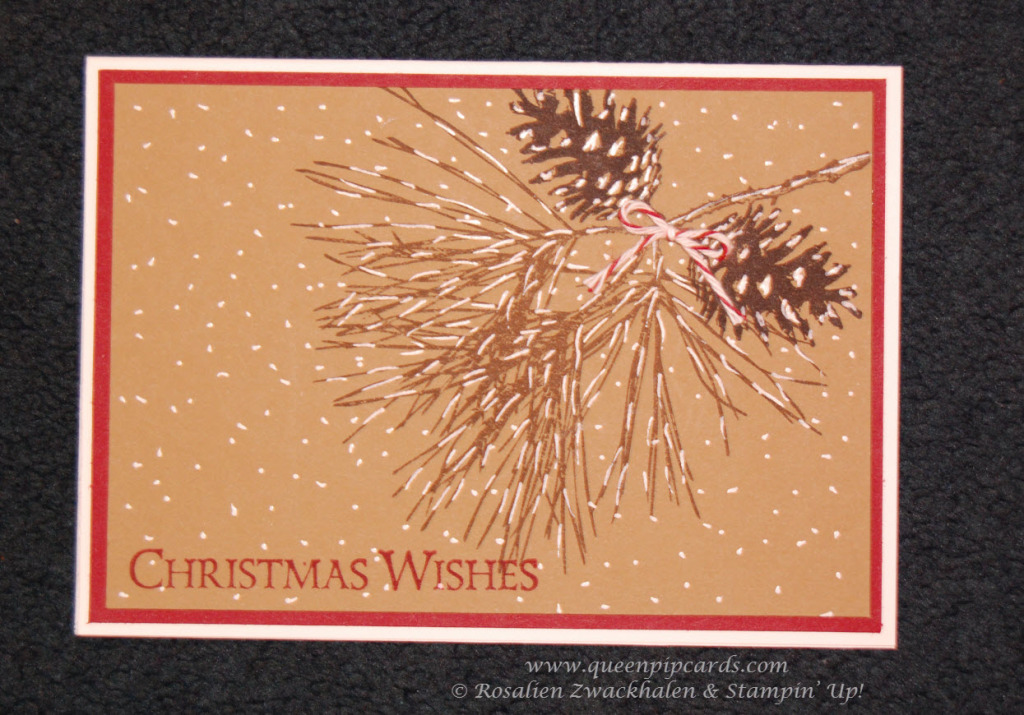
- Cut Whisper White cardstock A5 – fold in half
- Mat with Cherry Cobbler 14.4 cm x 10 cm
- Cut a Soft Suede layer 13.9 cm x 9.5cm and stamp the branches in Soft Suede ink
- Then stamp the Pine cones in Early Espresso
- Stamp the sentiment in Cherry Cobbler ink
- Using a White Gel pen outline the branches & Pine cones to give the impression of lying snow & dot over the rest of the layer to give the impression of falling now.
- Layer the pieces together & adhere a small Cherry Cobbler Bakers Twine bow to the branches by the Pine Cones
Beautiful – two similar cards, in style and even layout but two very different impressions. I loved them both, so wanted to share them both with you. Items below if you’d like to order anything you’ve seen here today – I’ve run into a few technical issues with my product builder, so I’m trying another one – but not all the products were available, so I’m going to revert to manual tomorrow! Wish me luck 🙂
Happy stamping and I’ll be back tomorrow with Day 8 of my Christmas Countdown, thanks for stopping by, Pip x


0 Comments